CharaChorder Lite (CCL)
Welcome to the Official CharaChorder Lite Guide. You can select the links below to navigate to the topics that you find most relevant.
The CharaChorder Lite is CharaChorder’s approach to introducing chording to a traditional, QWERTY keyboard. It’s small, sleek, and portable, but what truly sets the “CCL” apart from other keyboards is that it’s powered by CCOS. This makes the CCL a superpowered, chording keyboard that may be easier to learn than the CharaChorder One (CC1).
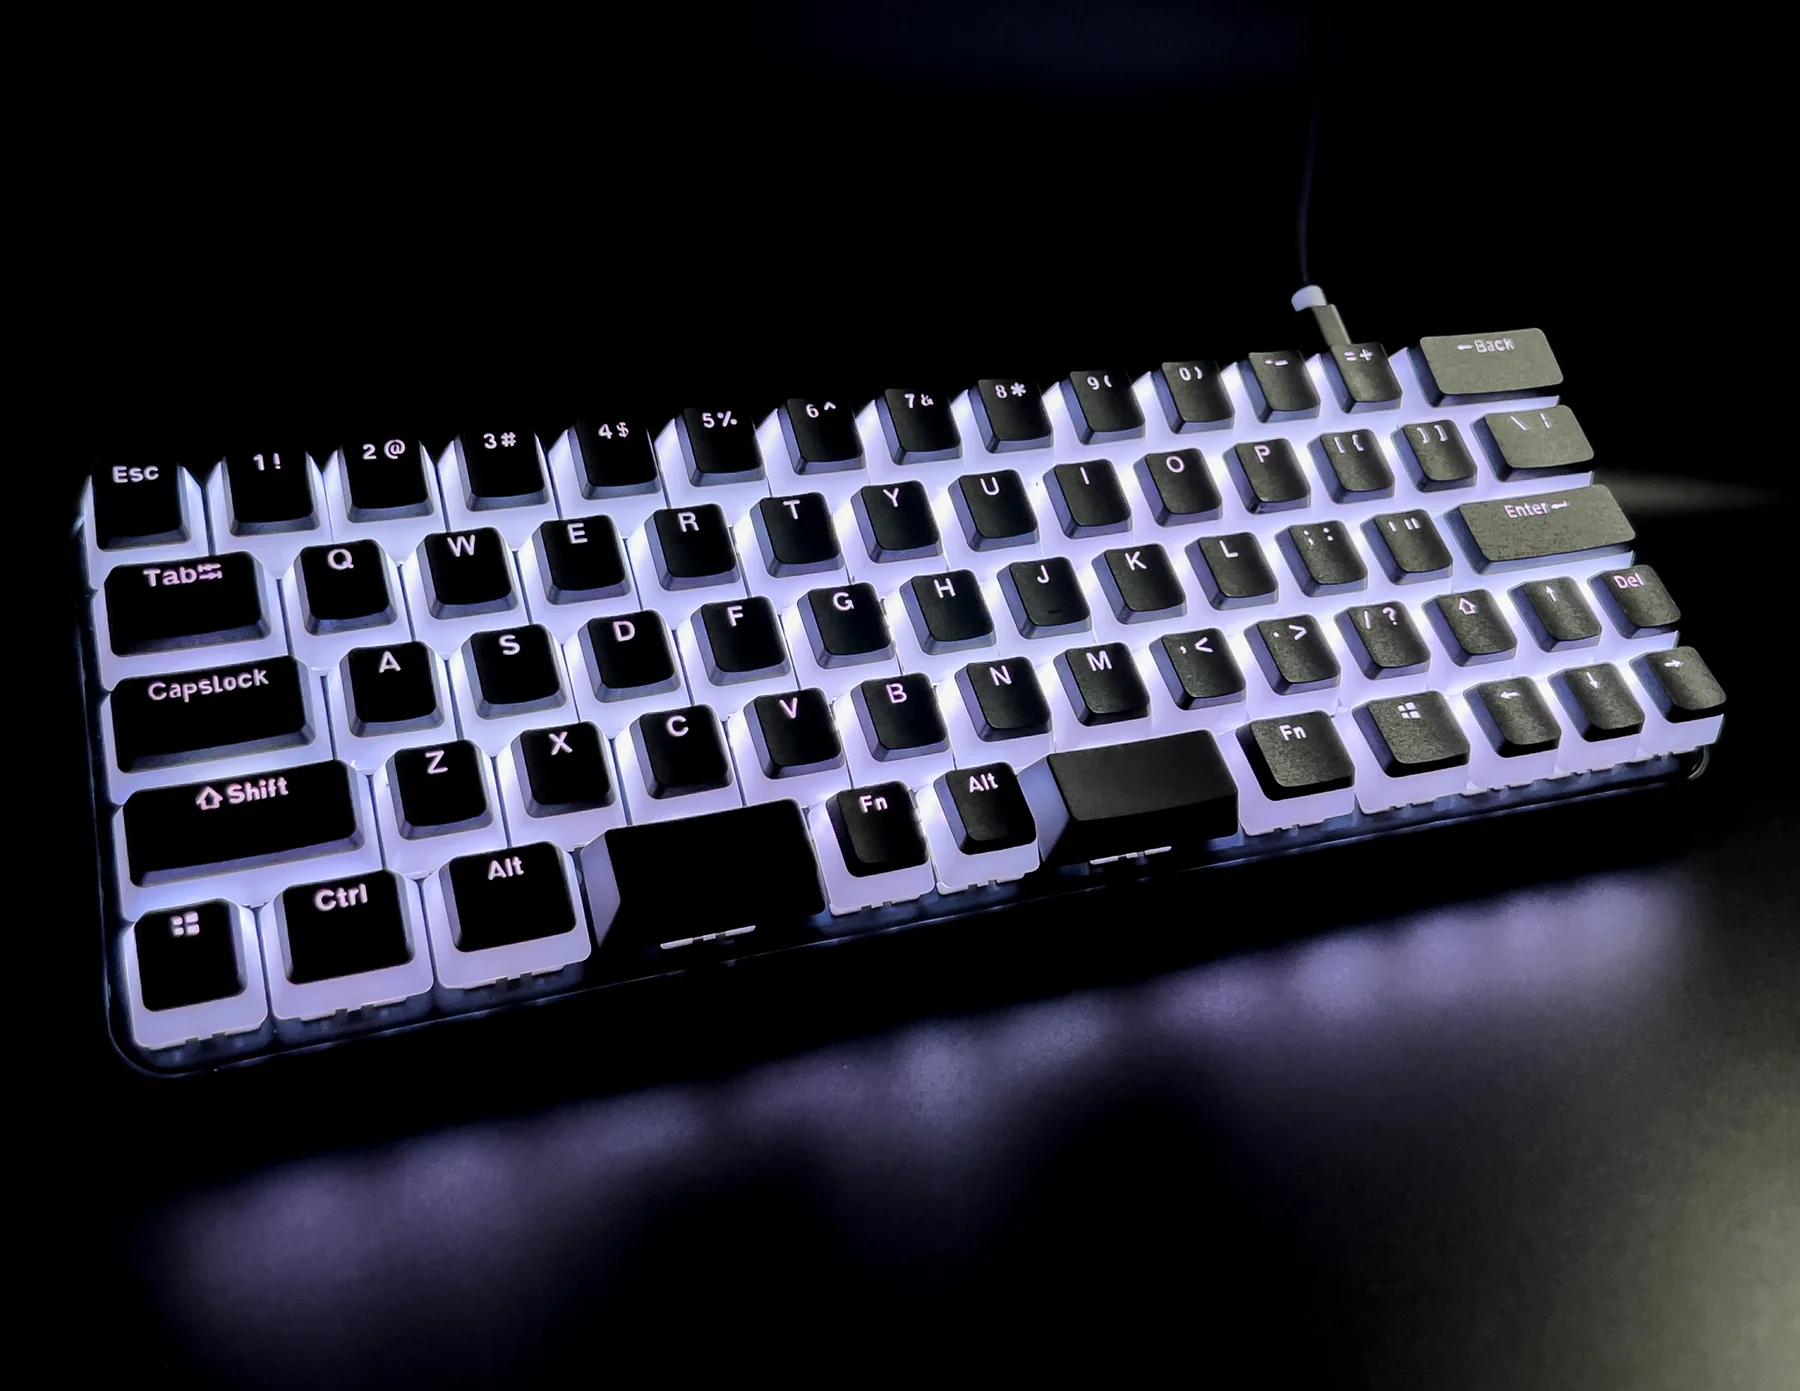
It boasts a beautiful set of keycaps, intentionally translucent to be able to appreciate the RGB backlights that breathe a modern look into the beautifully crafted keyboard.
Those who would rather build onto their muscle memory on a traditional, QWERTY keyboard can now take advantage of the CharaChorder Lite’s revolutionary technology and increase their speed and efficiency.
Out of the Box
Parts
When you first receive your CharaChorder Lite, it will come in a black box with the CharaChorder logo on the outside. Once you open the box, you’ll find your brand new CharaChorder Lite fully assembled. You will also find an insert that includes the layout of the device and some functions that the CharaChorder Lite has.
The CharaChorder Lite parts can be separated into two groups: internal and external. Internal parts are meant to remain inside the CharaChorder Lite, and users shouldn’t to remove them or change them. External parts are meant to be replaced, should the user choose to.
Internal Parts
Base
The CharaChorder Lite’s base is made of ABS plastic, which is designed and assembled in America.
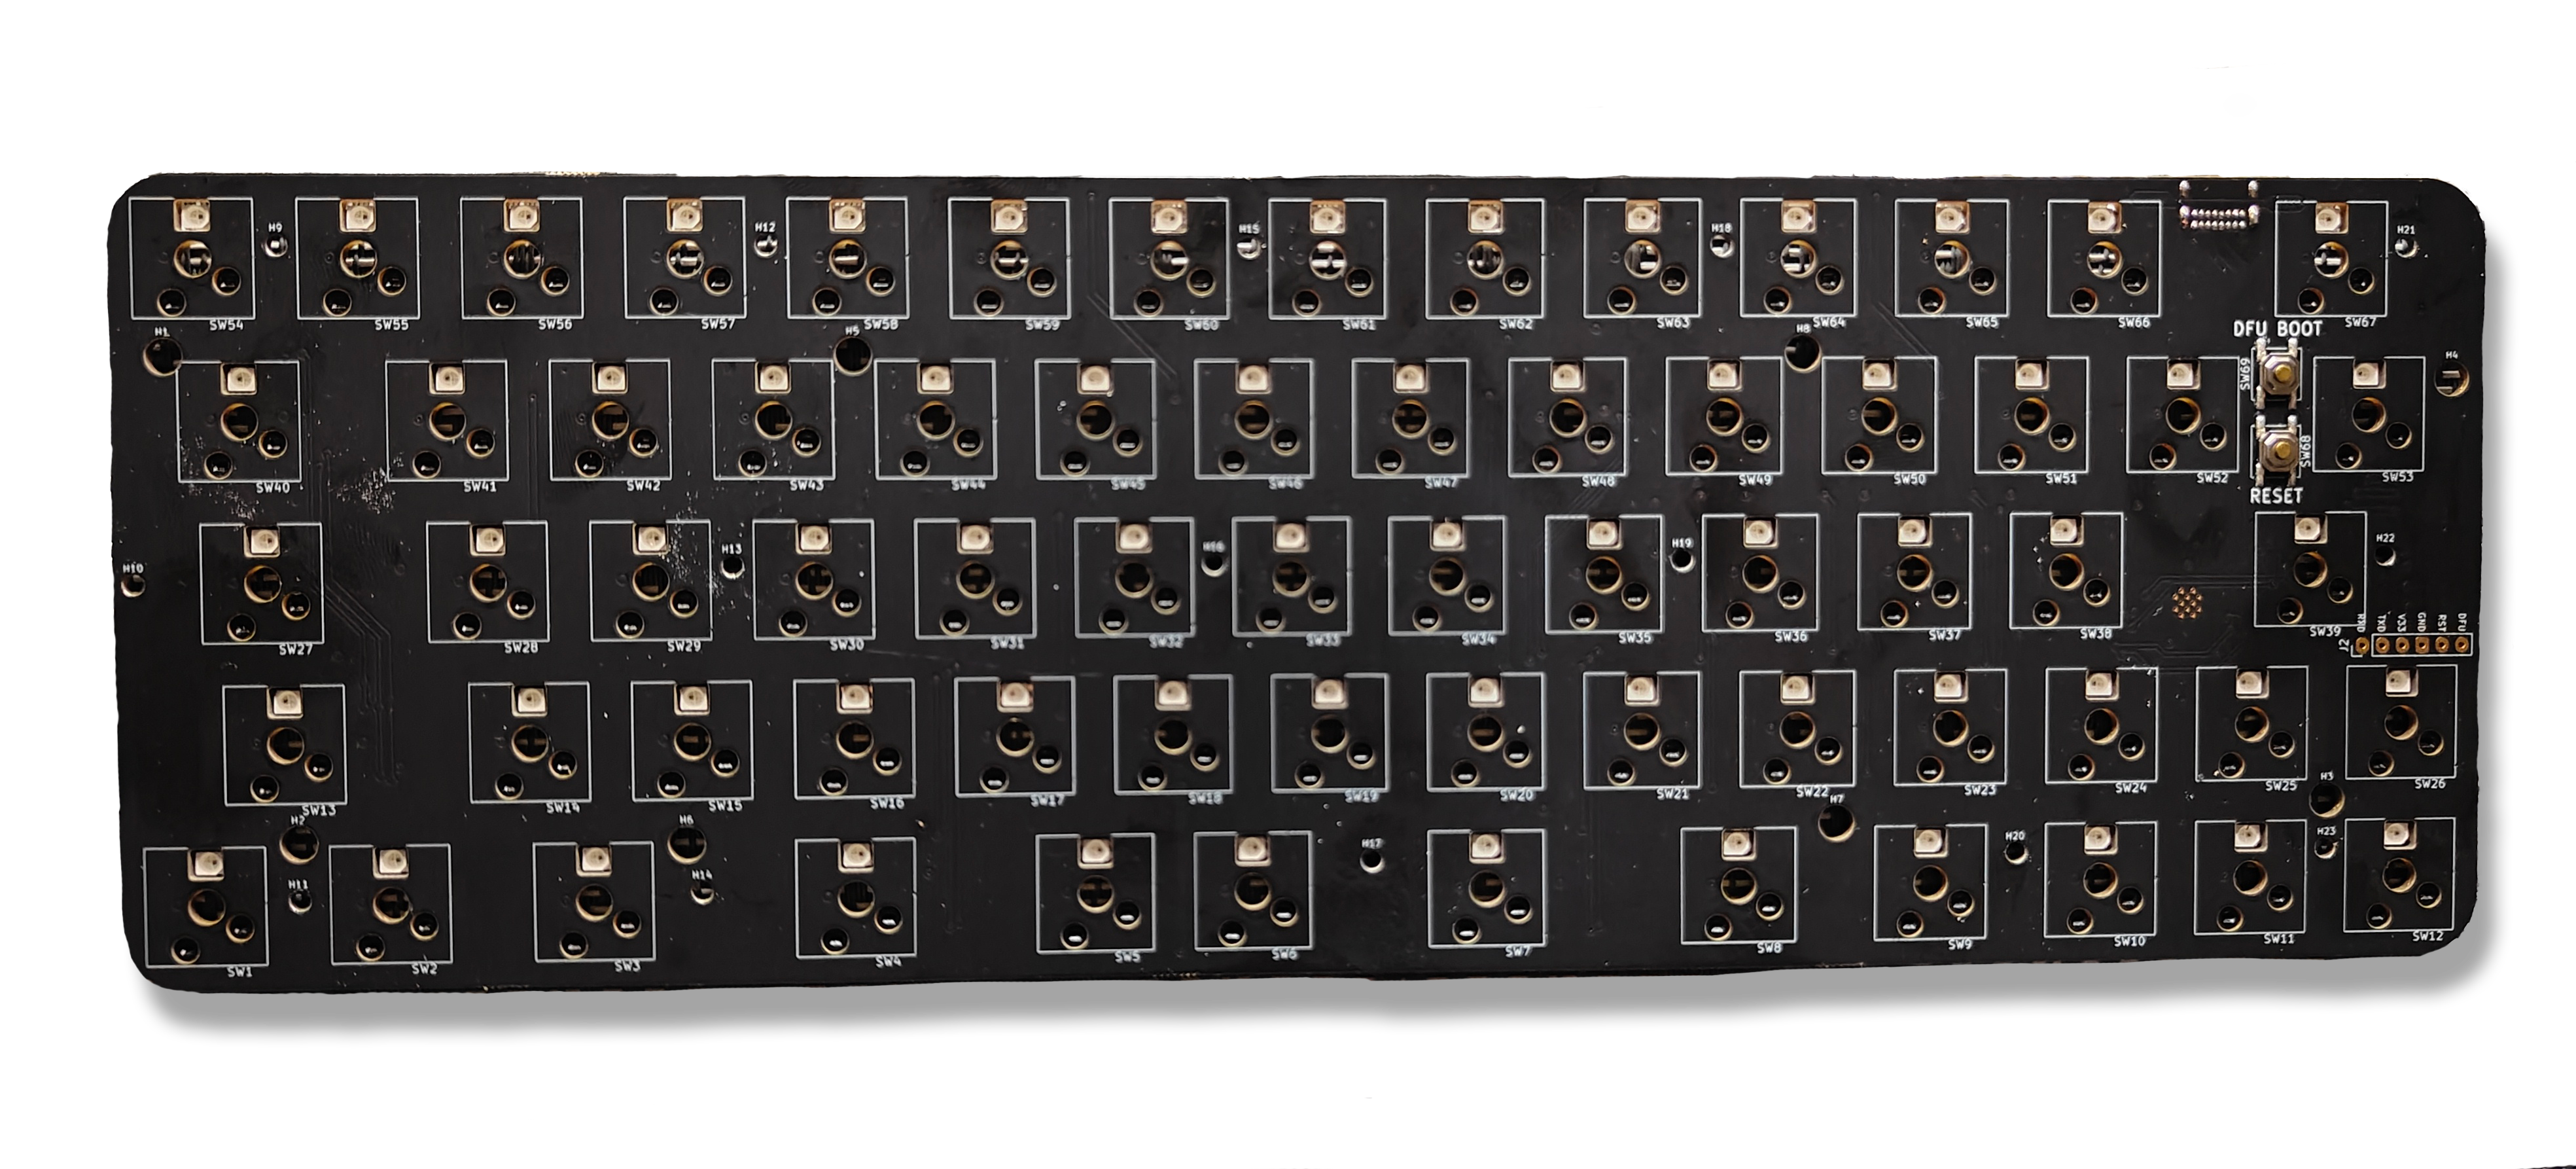
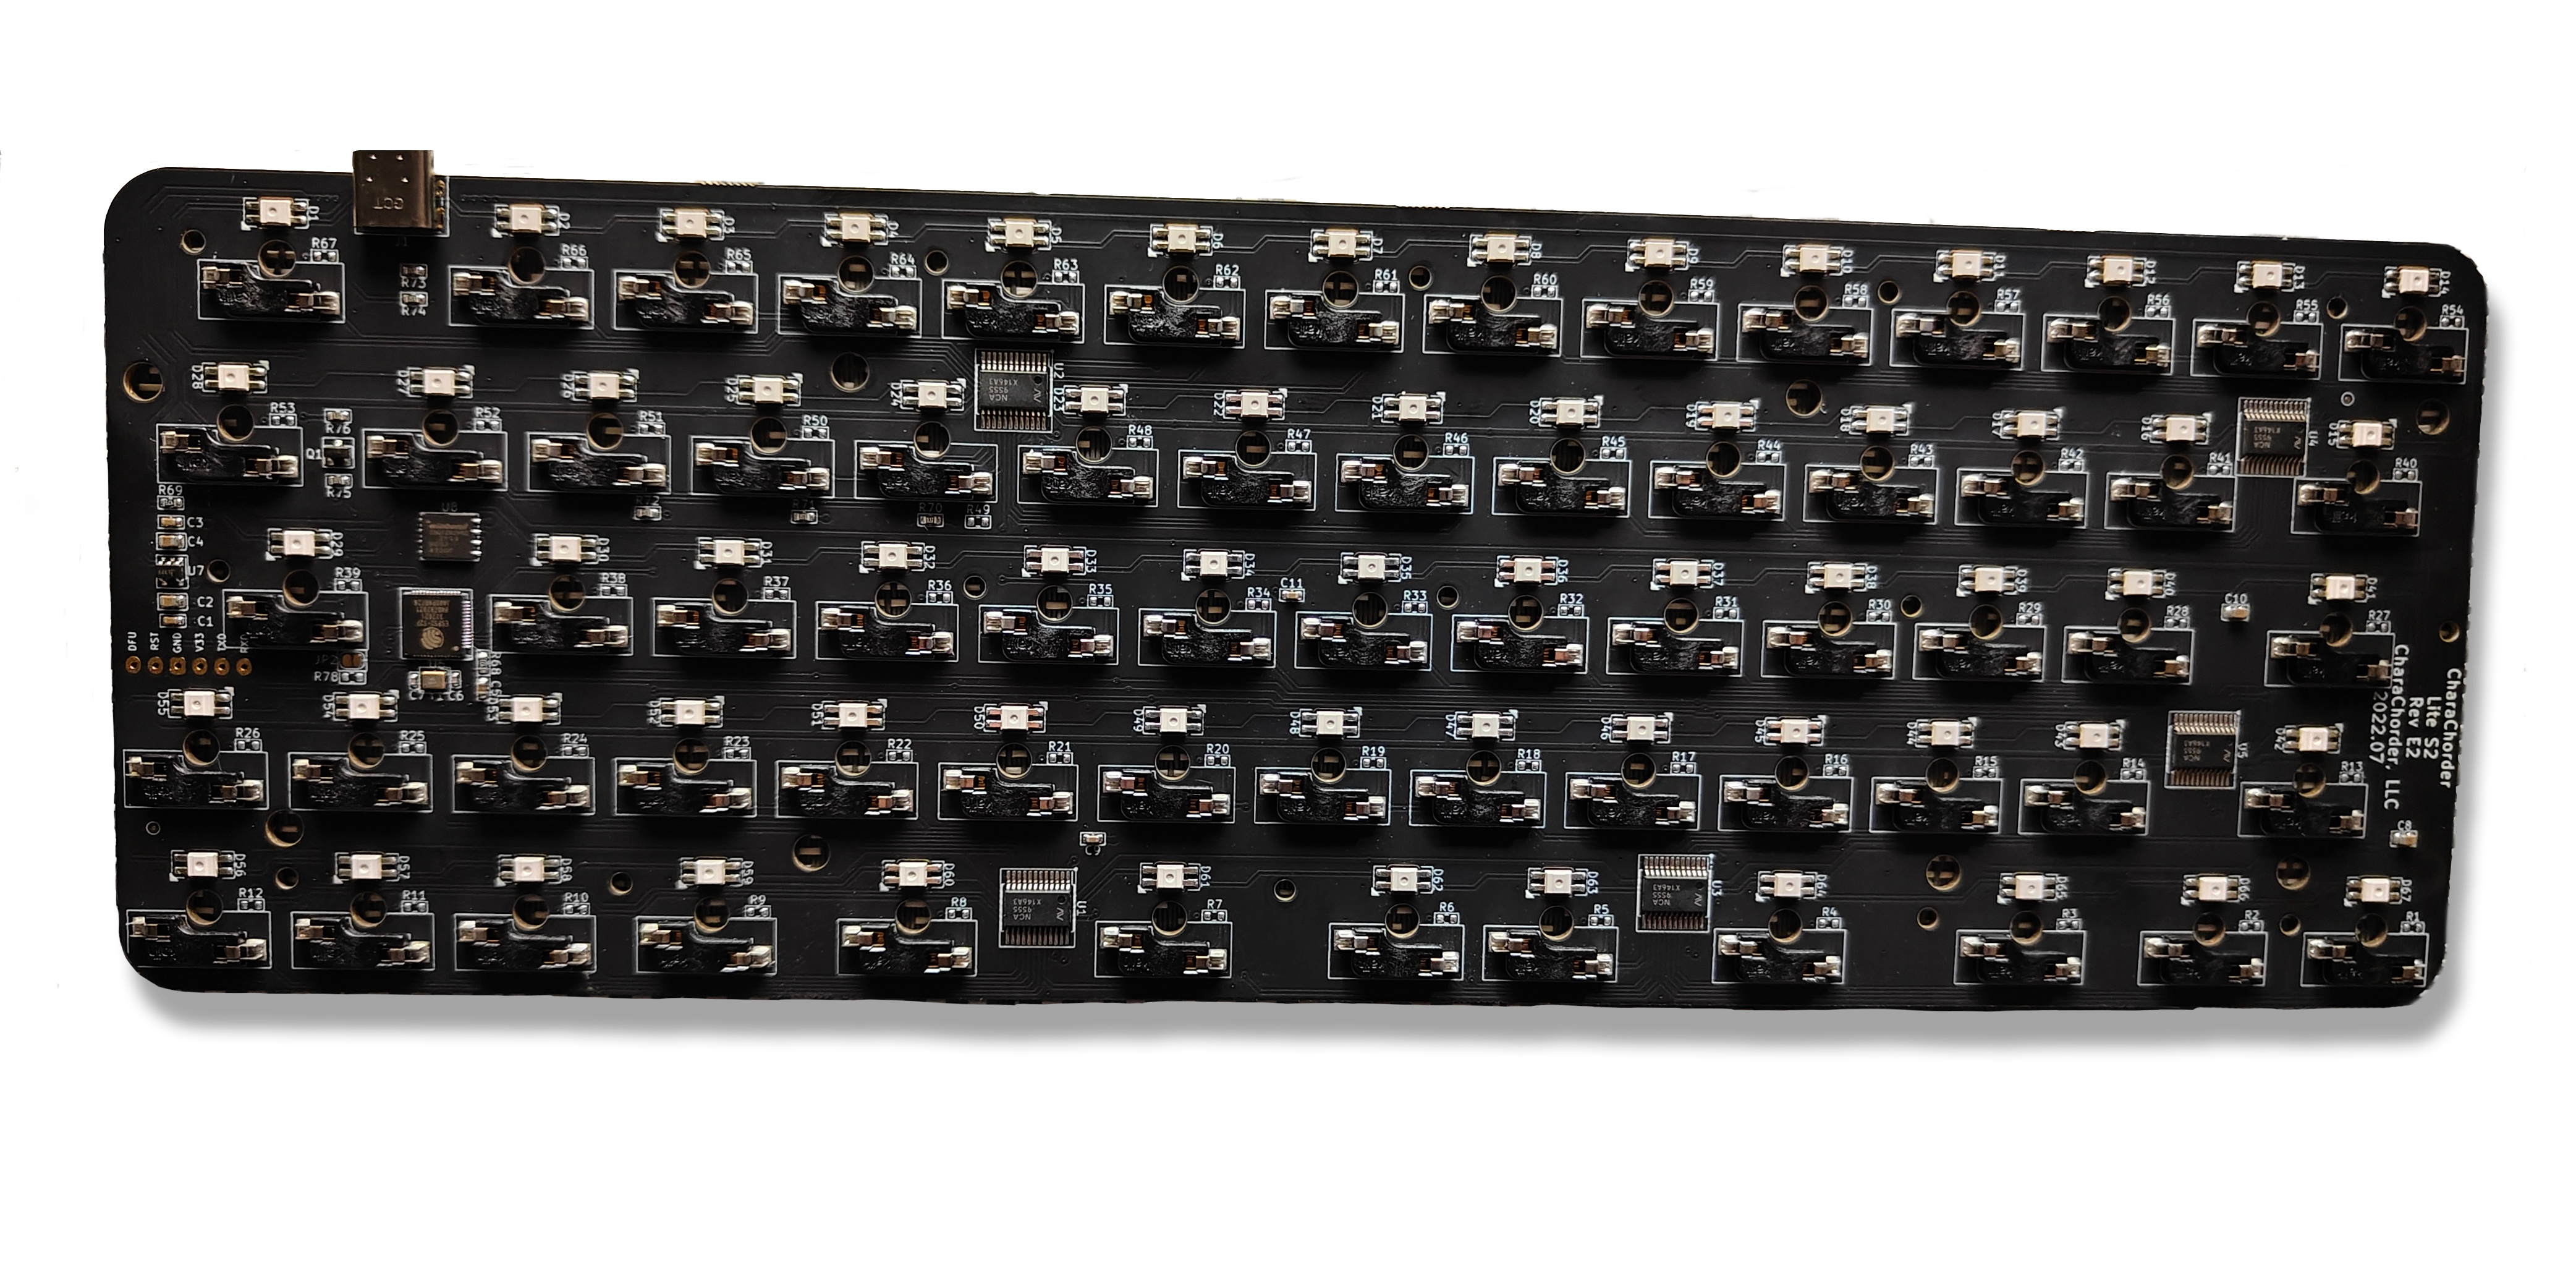
PCB
The CCL comes with a PCB “motherboard” that holds your CharaChorder’s chords, layout, settings, and the CCOS that powers the entire keyboard. It’s held securely in place between the base and the key plate.
Front:
Back:
Key Plate
The Lite’s Key Plate is also made of ABS plastic, designed and assembed in America.
External Parts
The CharaChorder Lite has two external components that can be removed and replaced by the user if they wanted to. These are the switches and the key caps. We call these items “hot-swappable” since they can be swapped for other versions that are purchased from a third-party.
Switches
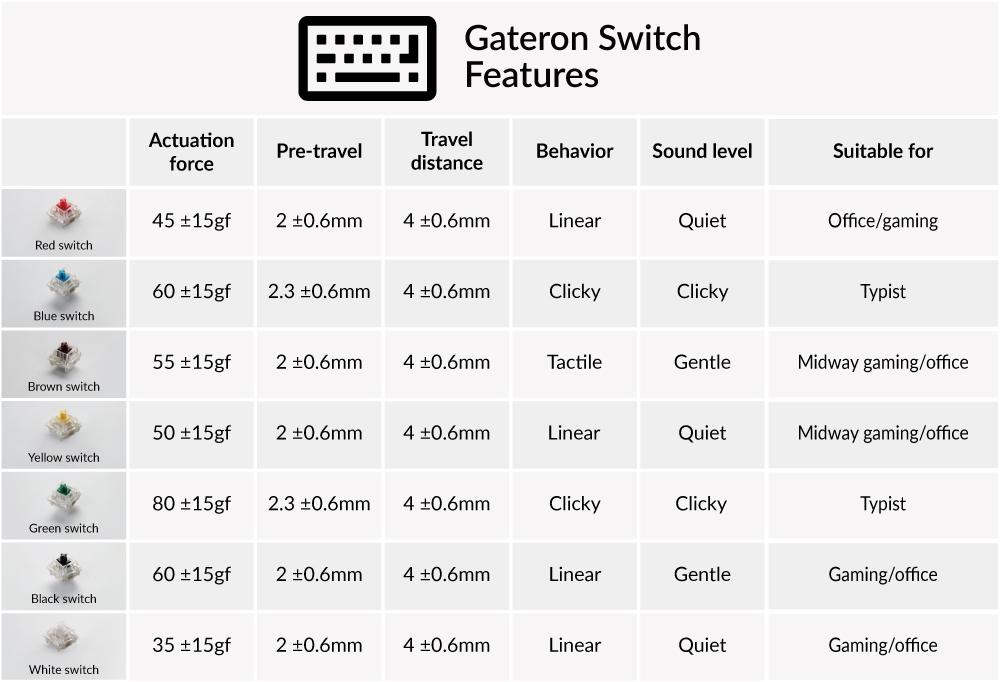
The CharaChorder Lite comes with a 60% set of Gateron Clear/White switches. These switches are mechanical and linear, and require only 35 grams (g) of force to actuate, making them some of the lightest switches on the market. We, at CharaChorder, find that lighter switches make chording quicker and more efficient, but you’re welcome to swap the default switches with other, third party options.
Note
When searching for switches that fit the CCL, make sure that the switches are labeled as “mechanical switches” and are three pin (not five pin). The CharaChorder Lite is a 60% keyboard, but you will only need 67 switches to fill the CharaChorder Lite.
What is a 60% keyboard?
A 60% keyboard, also known as a “compact keyboard”, is a computer keyboard that lacks a Numpad, a function row (F-Keys), and navigation keys (Home, Page Up, Page Down, etc.).

Note
Despite being a 60% keyboard, the CharaChorder Lite DOES have 4 arrow keys.
Key Caps
The CharaChorder Lite’s key caps are made specifically for the CCL, intentionally concave towards the center so as to help with finger placement. The only exceptions are the two space keys at the bottom, which are convex for prominence on the keyboard. These key caps are hot-swappable, so you’re welcome to personalize with third-party key caps to your taste.
When searching for key caps that fit the CCL, you’ll want to order some that are for a 65% keyboard, totaling at least 67 individual keys. Most of the CharaChorder Lite’s keys are traditional-sized, except a few exceptions that you can find in the layout section.
Connections
Your new CharaChorder Lite comes with one cable in the box; the power cable that goes out to the computer and also permits communication between your Lite and your computer.
Power and Communication
The CharaChorder Lite is powered by a single, braided USB-C to USB-A cable, with both ends being male ends. The USB-C side of the cable fits into the USB-C port on the back right of the CharaChorder Lite. The USB-A end of the cable is then plugged into your computer, or into a mobile device, usually with the help of an adapter.
Plugging In
The CharaChorder Lite is plug-and-play, so it doesn’t require any additional software to work.
If not done already, make sure that the USB-C side of the power cable is plugged into the back right of the CharaChorder Lite. It’s important to be certain that the cable is plugged all the way in; otherwise, the CharaChorder might not function as intended.
Note
The CharaChorder Lite has been sold with two different chips: M0 and S2
You can see which chip you have, by connecting to the Device Manager, then looking at the bottom middle of the page, after the device name:
- CharaChorder Lite M0 (bought before oct 1st, 2022)
If you have the M0 chip, continue reading the warning and instructions about the startup message below.
- CharaChorder Lite S2 (bought after oct 1st, 2022)
If you have the S2 chip, then you can skip to the Getting Started section, because the startup message has been removed on instant boot devices (CCOS 2.1.0).
Warning
By default, the device sends a startup message, on every boot or re-plug. In some cases, this can interfere with functions on your computer or cause unwanted behavior. This feature can be disabled in the GTM.
After making sure that the cable on the CharaChorder is properly plugged in, connect the USB-A side of the power cable into a USB-A port on your computer. Upon connecting, you may notice the following things:
If your cursor is somewhere where text can be entered…
You will first see the text “Loading ### Chordmaps” highlighted, and a few moments later, “CCOS is ready.”
Regardless of whether or not your cursor is somewhere where text can be entered…
You will be able to see your keyboard’s lights flash from left to right, then go completely dark. After a few moments, the entire keyboard will be lit up with the LED backlighting.
If you have startup enabled, once you can see the highlighted text that reads “CCOS is ready.”, your device is ready to be used. If you have LEDs turned on, once you see all of the lights turned on and static, your device is ready to be used.
Note
The Startup message is enabled by default on new CharaChorder devices.
Getting Started
There are a few steps that you’ll likely want to take if this is your first time using your CharaChorder device. In the following section, we will update your device, briefly explain navigation in the GTM, and demonstrate the default layout on your new device.
Updating your Device
Warning
IMPORTANT: If your device shipped from our warehouse before 2023, it’s possible that it is running an obsolete firmware. You can read instructions on how to upgrade your device to our new CCOS here. If your device is not running CCOS, you will be unable to follow the steps below to update your device.
Checking your Device’s Firmware
You can check your device’s current firmware by following the steps below:
On a chromium based browser, such as Chrome, go to the CharaChorder Device Manager (Linux users see this link for more information about configuring serial port access.)
Click “Connect” at the bottom middle of the page
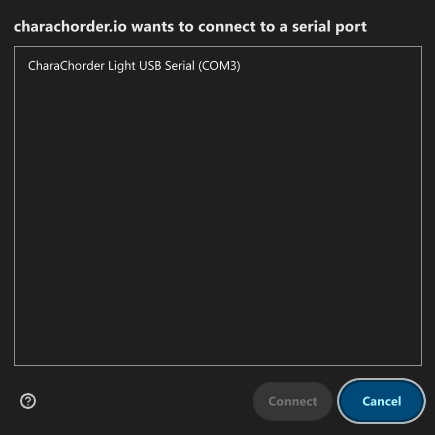
When the popup box comes up that reads “charachorder.io wants to connect to a serial port”, choose your CharaChorder device, then click the “connect” button
After following the above steps, you can find your
firmware version in the bottom left of your screen. It will read
something like this: CCOS 2.1.0
Updating the Firmware
If you find that your device is not running the latest firmware version, you can follow the steps below to update your device. You can check which is the latest firmware release by visiting this site.
Warning
IMPORTANT: Before performing the below steps, please make sure that you have a backup of your layout, chord library, and settings. The update might reset those, so it’s important that you keep backup files handy. For instructions on how to restore backed up files, visit the Backups section.
On a chromium based browser, such as Chrome, go to the CharaChorder Device Manager
If not auto-connected, click “Connect”
When the popup box comes up that reads “charachorder.io wants to connect to a serial port”, choose your CharaChorder device, then click the “connect” button
Click on the CCOS version on the bottom left of the page

You will see a list of available versions along with their release date. Click on the one you want.
If you have a Lite S2, you’ll be able to just click “Apply Update”. If you device does not have that option, you have a M0 device and can follow the steps on screen to update your device.
At this point, your device will automatically reboot. Congratulations! You have successfully updated your device. You can check your device’s firmware version by following the steps here.
Understanding the Settings
The CharaChorder Lite has settings that are user-configurable. Since the device is plug-and-play, you don’t need any software to edit the device’s settings; all you need is a place to type text. We call these settings the Generative Text Menu, or GTM for short.
On the CharaChorder Lite, you can access the GTM by
chording the right ALT key and the letter G.
Once you perform the chord to call up the GTM, your CharaChorder will type out the menu and its options. It will look something like this:
CharaChorder GTM [ >K<eyboard || >M<ouse || >C<hording || >D<isplay || >R<esources ]
Navigation around this menu is based on letter presses. In the example
above, you can select the desired submenu by pressing the letter between
the angle brackets (for example: >K<) in your target submenu on your
CharaChorder One. In the example above, you would press K for
Keyboard, M for Mouse, C for Chording, D for Display, and
R for Resources.
In some submenus, you will see numeric values. In order to increase or decrease these, you can use the arrow keys on your CharaChorder Lite.
CharaChorder > Chording > Press Tolerance [ Use up/down arrow keys to adjust: 25ms ]
You can read an explanation of all of the settings on your CharaChorder device here.
Learning the Layout
Note
This section assumes that you are using your CharaChorder device with a US International OS layout selected on your computer. For instructions on how to change your OS layout, visit this page.
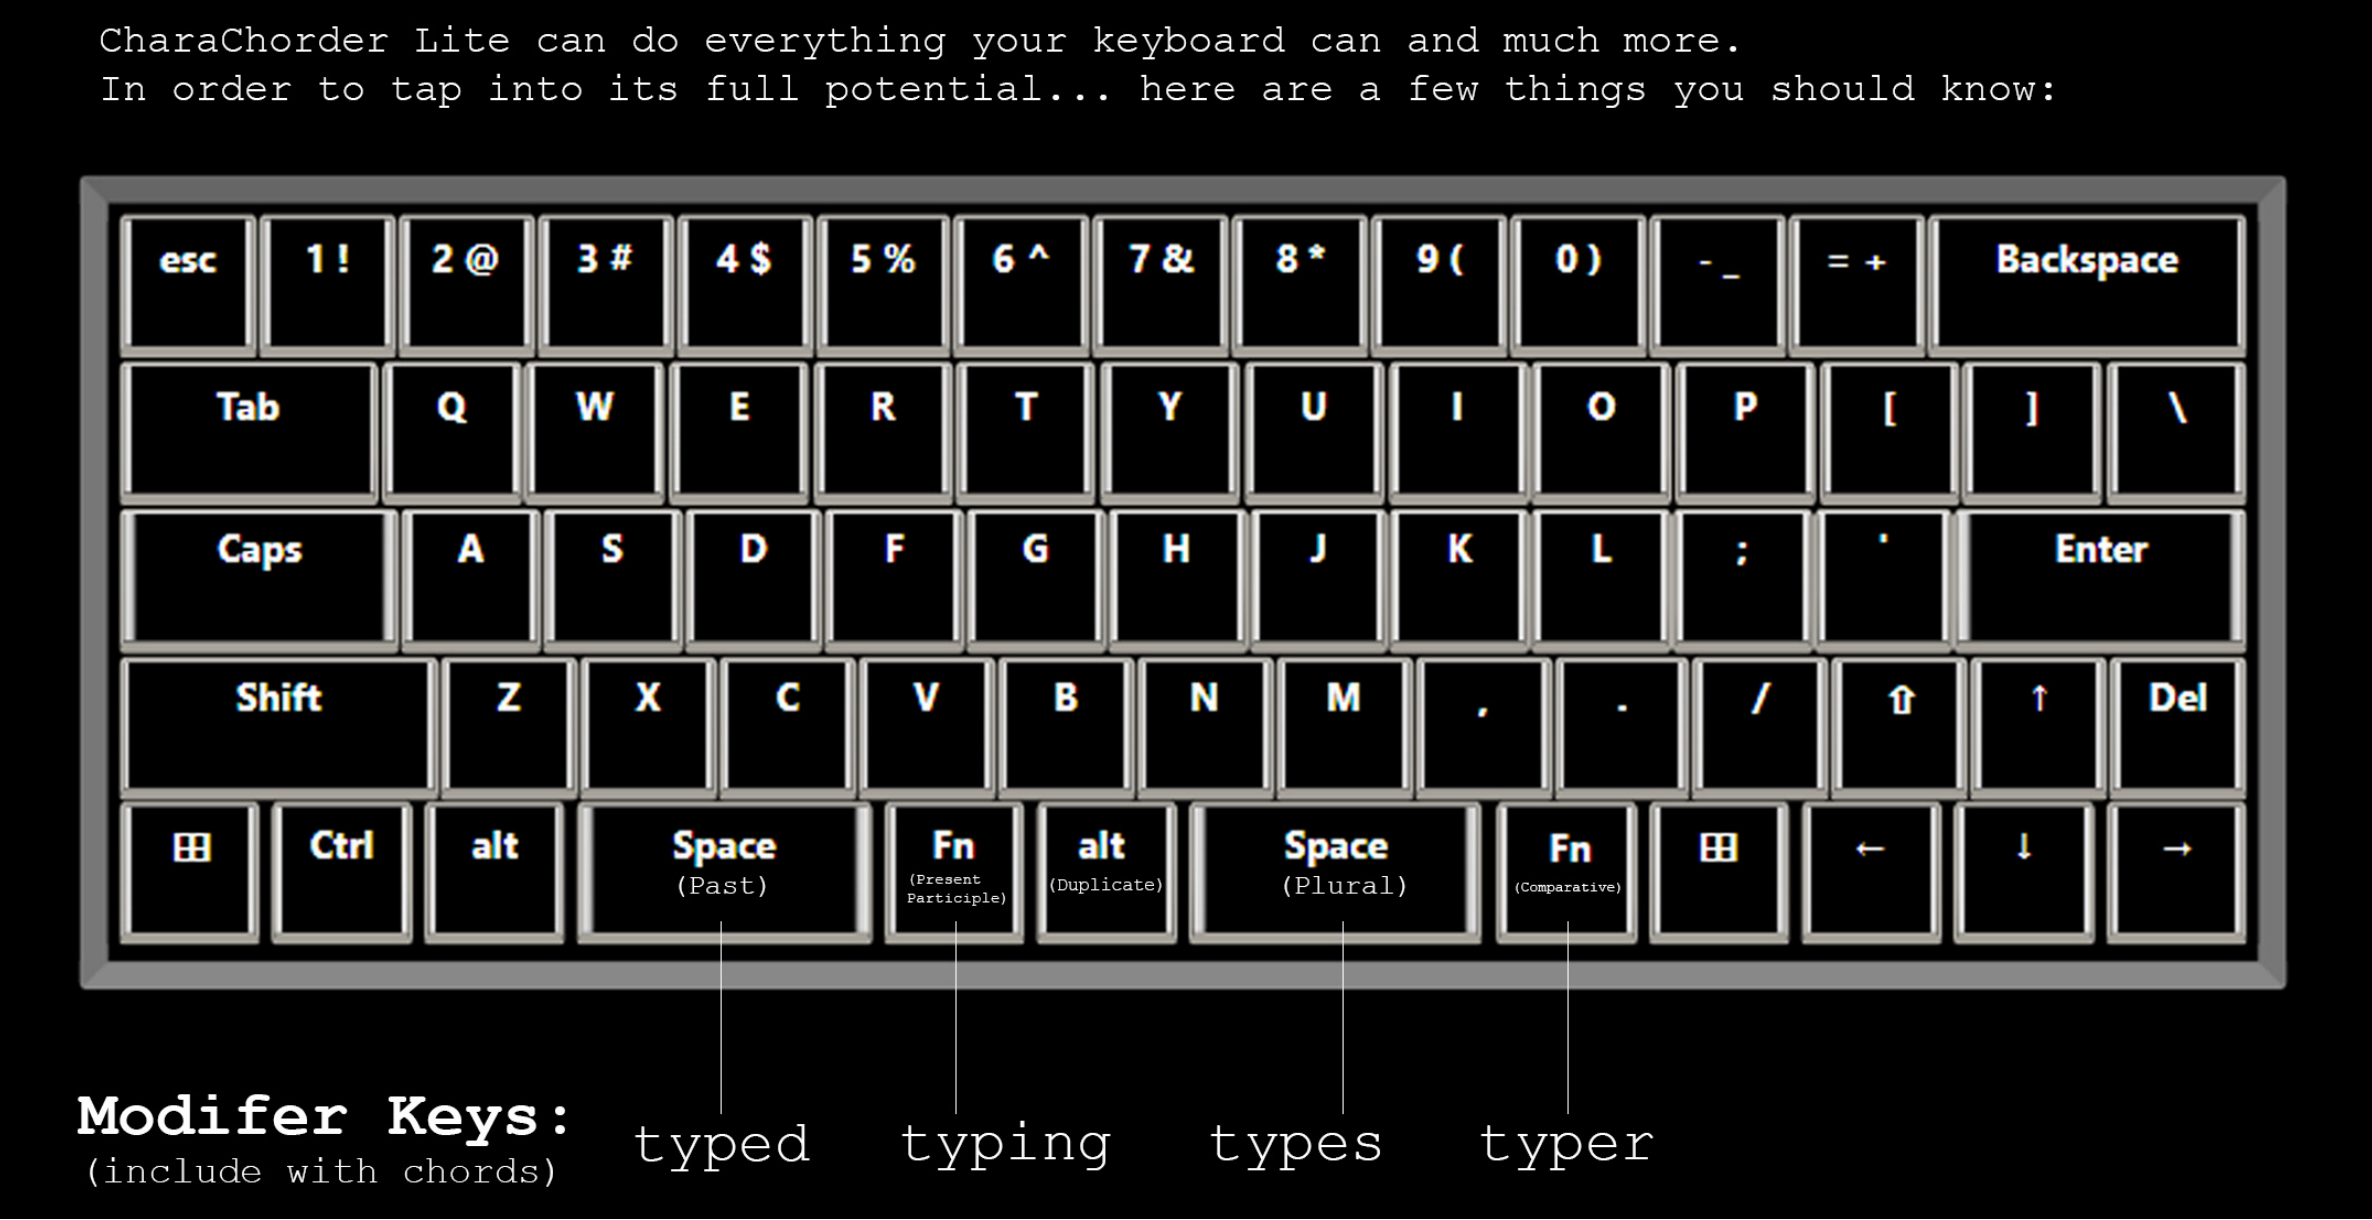
The CharaChorder Lite’s layout is mostly traditional QWERTY. All of the letters and numbers are where you would expect them on other keyboards. However, there are some keys that are moved around, and a couple of extra keys as well. We’ll describe the Lite’s layout below. Remember that you can always remap the keys to your liking on the CharaChorder Device Manager.
Earlier, we explained that the CharaChorder Lite is a 60% keyboard. It’s been named that because it’s missing the navigation keys usually present on 65% keyboards, though it still has four arrow keys. Therefore, it is accurate to refer to the CCL as a 60%+6 keyboard, where the 6 refers to keys that aren’t usually on a 60% keyboard. Additionally, the CCL has 67 keys, instead of the 61 keys that 60% keyboards traditionally have.
Keys that are included are on the CharaChorder Lite are the 26 letters of the English alphabet, the 10 number keys (along with their SHIFT variants), a single backspace, one TAB key, opening ([) and closing (]) bracket keys as well as their SHIFT variants, a backslash (\) and its SHIFT variant, a CAPSLOCK key, a colon (:) key and its SHIFT variant, an apostrophe (') and its SHIFT variant, an ENTER key, a full-size SHIFT key on the left as well as a smaller SHIFT key on the right side, comma (,), period (.), and forward slash (/) keys and their SHIFT variants, a small DELETE key, a GUI key on the left and one on the right (Windows key, Command key, Super key, etc), a single CONTROL key, LEFT ALT and RIGHT ALT keys, two space keys, two A2 layer access keys labeled Fn, and four arrow keys.
Layers
The CharaChorder Lite has 3 layers: the base layer, called the A1 (Alpha) layer, the secondary layer, referred to as A2 (Numeric), and the tertiary layer, named A3 (Function). Being as the CharaChorder Lite has 67 individual keys and considering that each layer has access to all of those 67 keys, we have over 180 assignable slots on the entire device.
In this section, we’ll refer only to the default CharaChorder Lite layout. If you have modified your layout to something different, then the next portion might not be accurate for your device. If you have purchased your device from CharaChorder, then the following is accurate to your device.
A1 Layer
The A1 layer is the main layer that is active by default. The default CharaChorder Lite layout has all 26 letters of the English alphabet on the A1 layer so that you can access all of them without having to hold or press anything else. Your device will always be in the A1 layer upon boot.
While the A1 layer is active on the CharaChorder Lite by default, you can map the A1 access key, which bears the name “KM_1_R” or “KM_1_L”, on the layout manager site. There is no real need to map the A1 access keys.

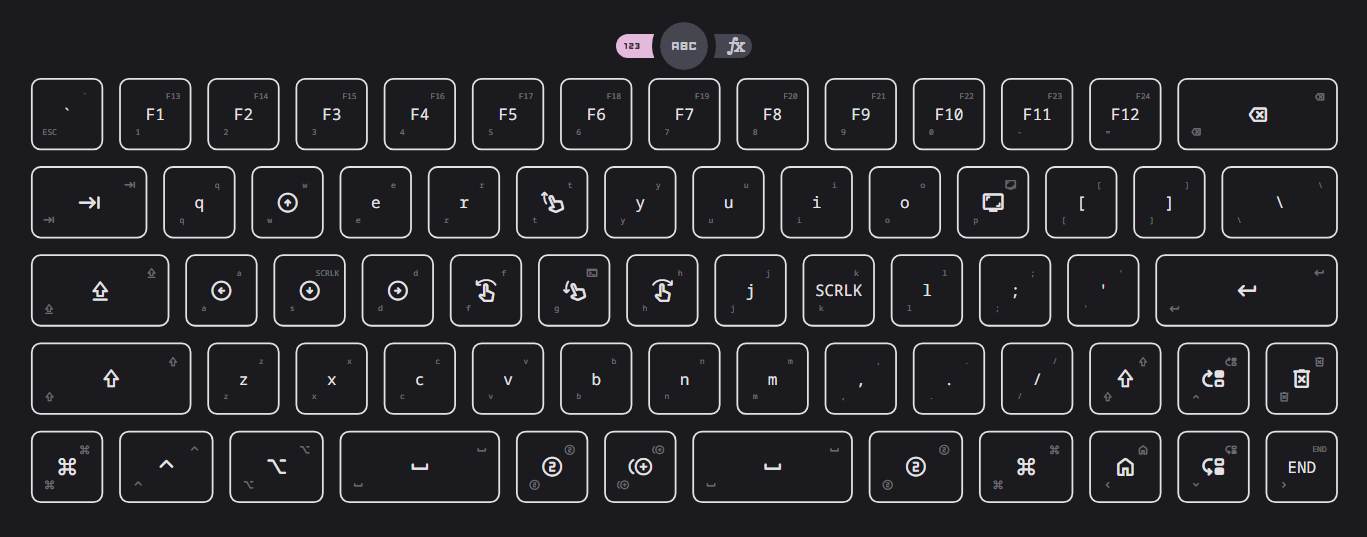
A2 Layer
The A2 layer, sometimes referred to as the “numeric layer”, is accessible
with the A2 access key. This key is mapped by default on the CharaChorder Lite to the keys labeled Fn. In the device manager this key has the name “KM_2_L” and “KM_2_R”, one for each side of the
CharaChorder.
The A2 Layer is accessible by pressing and holding either one of the layer access buttons. You do not have to hold them both, only one is required. Any key that is on the A2 Layer can only be accessed by pressing and holding the A2 Layer access key along with the target key. You do not need to chord the keys together; it’s only required that the A2 Layer access key is pressed while the target key is pressed.
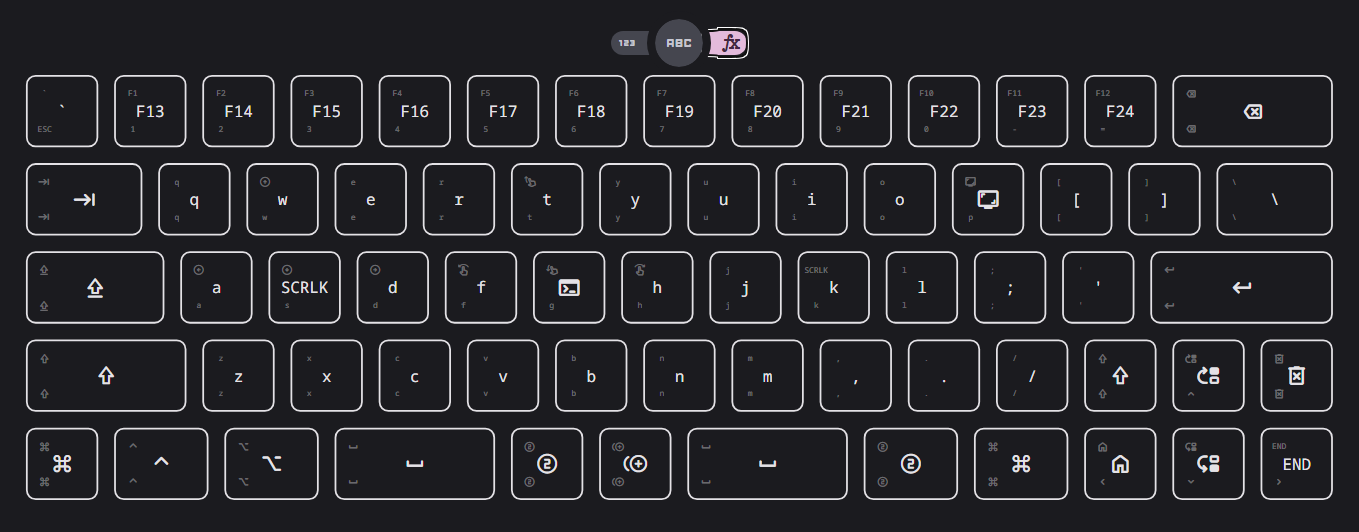
A3 Layer
The A3 layer, sometimes referred to as the “function layer”, is accessible with the A3 access key. This key is not mapped by default on the CharaChorder Lite, but you can add it to your device by remapping. On the CharaChorder Device Manager, this key is assignable by the names “KM_3_L” and “KM_3_R”.
Once you’ve mapped the A3 layer access buttons, the A3 Layer is accessible by pressing and holding either one of them. You do not have to hold them both in order to access the A3 layer. Any key that is on the A3 Layer can only be accessed by pressing and holding the A3 access key, along with the target key. You do not need to chord the keys together; it’s only required that the A3 layer access key is pressed while the target key is pressed.
Shift Modifier
On top of the three aforementioned layers, the Shift key, which is a keyboard modifier, can be used to access some extra keys. The Shift key press works just like it would on a traditional keyboard. You can capitalize letters and access symbols attached to numbers. This works with any key on any layer, just like other keyboard modifiers (such as Ctrl and Alt). The Shift modifier output is currently controlled by the Operating System that your CharaChorder is plugged to, and it is not possible to customize their outputs.
On the CharaChorder Device Manager, this key has the name “Left_Shift” and “Right_Shift”, one for each side of the CharaChorder.
By default, the Shift is accessible by pressing and holding either Shift Key. You do not have to hold them both, only one is required. Any key that requires the Shift Modifier can only be accessed by pressing and holding the Shift key along with the target key. You do not need to chord the keys together; it’s only required that the Shift key is pressed while the target key is pressed.
AltGraph Modifier
While using the US INTL OS layout on your computer, you can take advantage of a modifier known as AltGraph, AltGr, or right alt. This keyboard modifier is used to provide additional graphemes for most keys. You can use the AltGraph modifier to create accented characters such as á, é, í, ó, ú, among others.
The AltGraph modifier output is currently controlled by the Operating System that your CharaChorder is plugged into, and it is not possible to customize their outputs. Those outputs are determined by the computer’s OS.
By default, the right alt is accessible by pressing and holding the right alt. You do not need to chord the keys together; it’s only required that the AltGraph key is pressed while the target key is pressed. On the CharaChorder Device Manager, this key has the name “AltGraph”.
Configurability
The CharaChorder Lite’s layout is configurable, which means that you can remap all keys. Though the QWERTY layout is loved by many, some users may choose to remap their device’s layout to better suit their personal needs. For an explanation of how remapping works and how to remap your device, visit the remapping section.
Practice
Now that you’re familiar with your new CharaChorder device, it’s time to use it! Head over to the training section for instructions on how to get started with learning to chord. If you want to just jump in without having to read a minute longer, head on over to our training website; https://www.iq-eq.io/#/
