CharaChorder X (CCX)
Welcome to the Official CharaChorder X guide.
The CharaChorder X is a plug-and-play device that serves as a middle-man between your keyboard and your computer. It allows any keyboard to have chording capabilities. Essentially, the CharaChorder X is a supersuit for your keyboard that will give it the power of chording.
What is chording? Put simply, chording is the action of pressing and releasing multiple keys at once to get a predetermined output. For example, we can press b and c simultaneously, and quickly release them, also simultaneously, to get the word “because”. This enables you to type one word at a time, instead of one letter at a time.
Although the CharaChorder X is a very powerful device, it is limited by the keyboard that you use it with. One example of this is that chording relies on your keyboard’s rollover limits. A keyboard with 3-key rollover (3KRO) will not be able to make use of chords that use more than 3 keys in their input. We recommend using a keyboard with N-key rollover (NKRO) for best results. Feel free to choose from the list below to read the topics that you find relevant.
Out of the Box
Parts
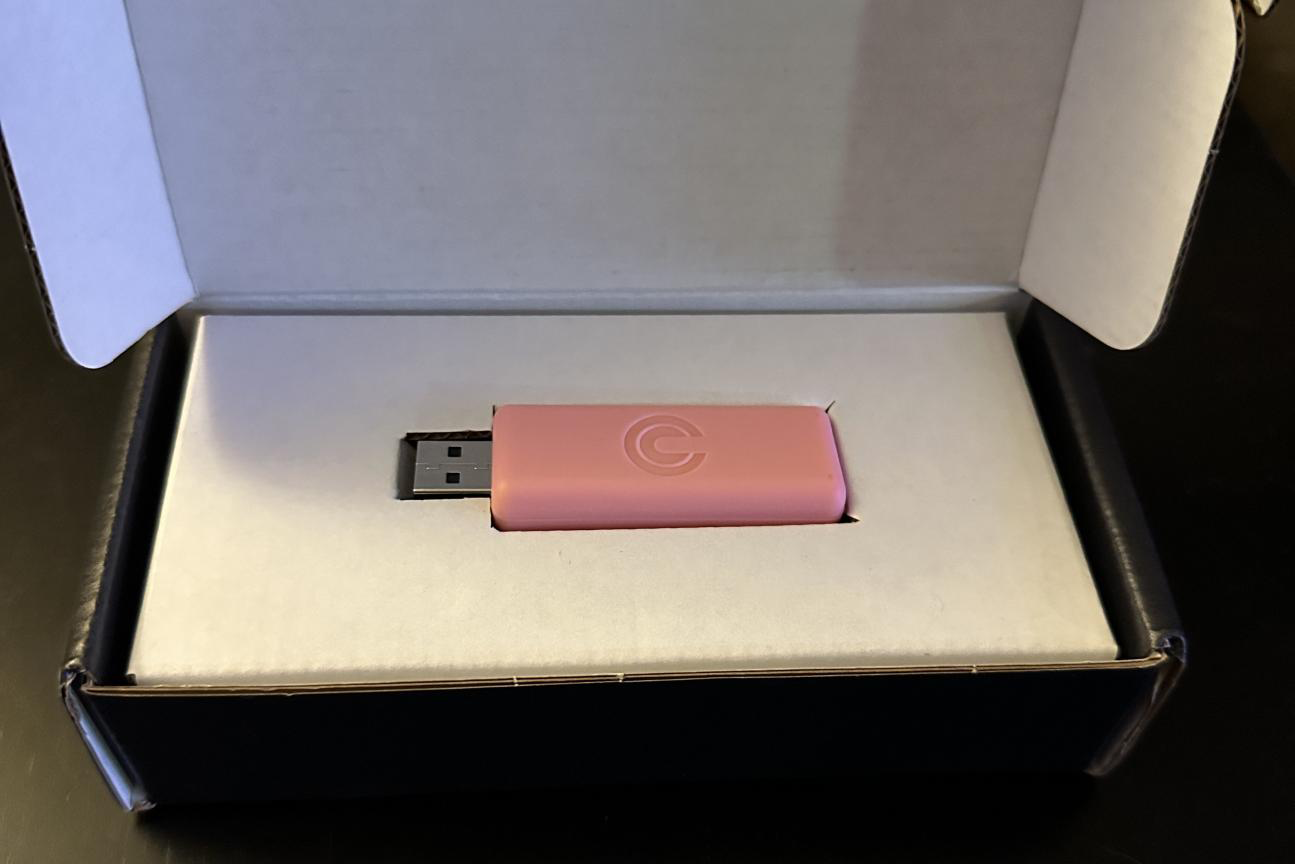
When you first receive your CharaChorder X, it will come in a black box with the CharaChorder logo on the outside. Once you open the box, you’ll find your brand new CharaChorder X inside, safely tucked inside a cardboard cutout. You will also find an insert that gives instructions on how to connect the CharaChorder X to your computer. On that reference guide, you will also find a link to our site which contains valuable resources to help you get started.
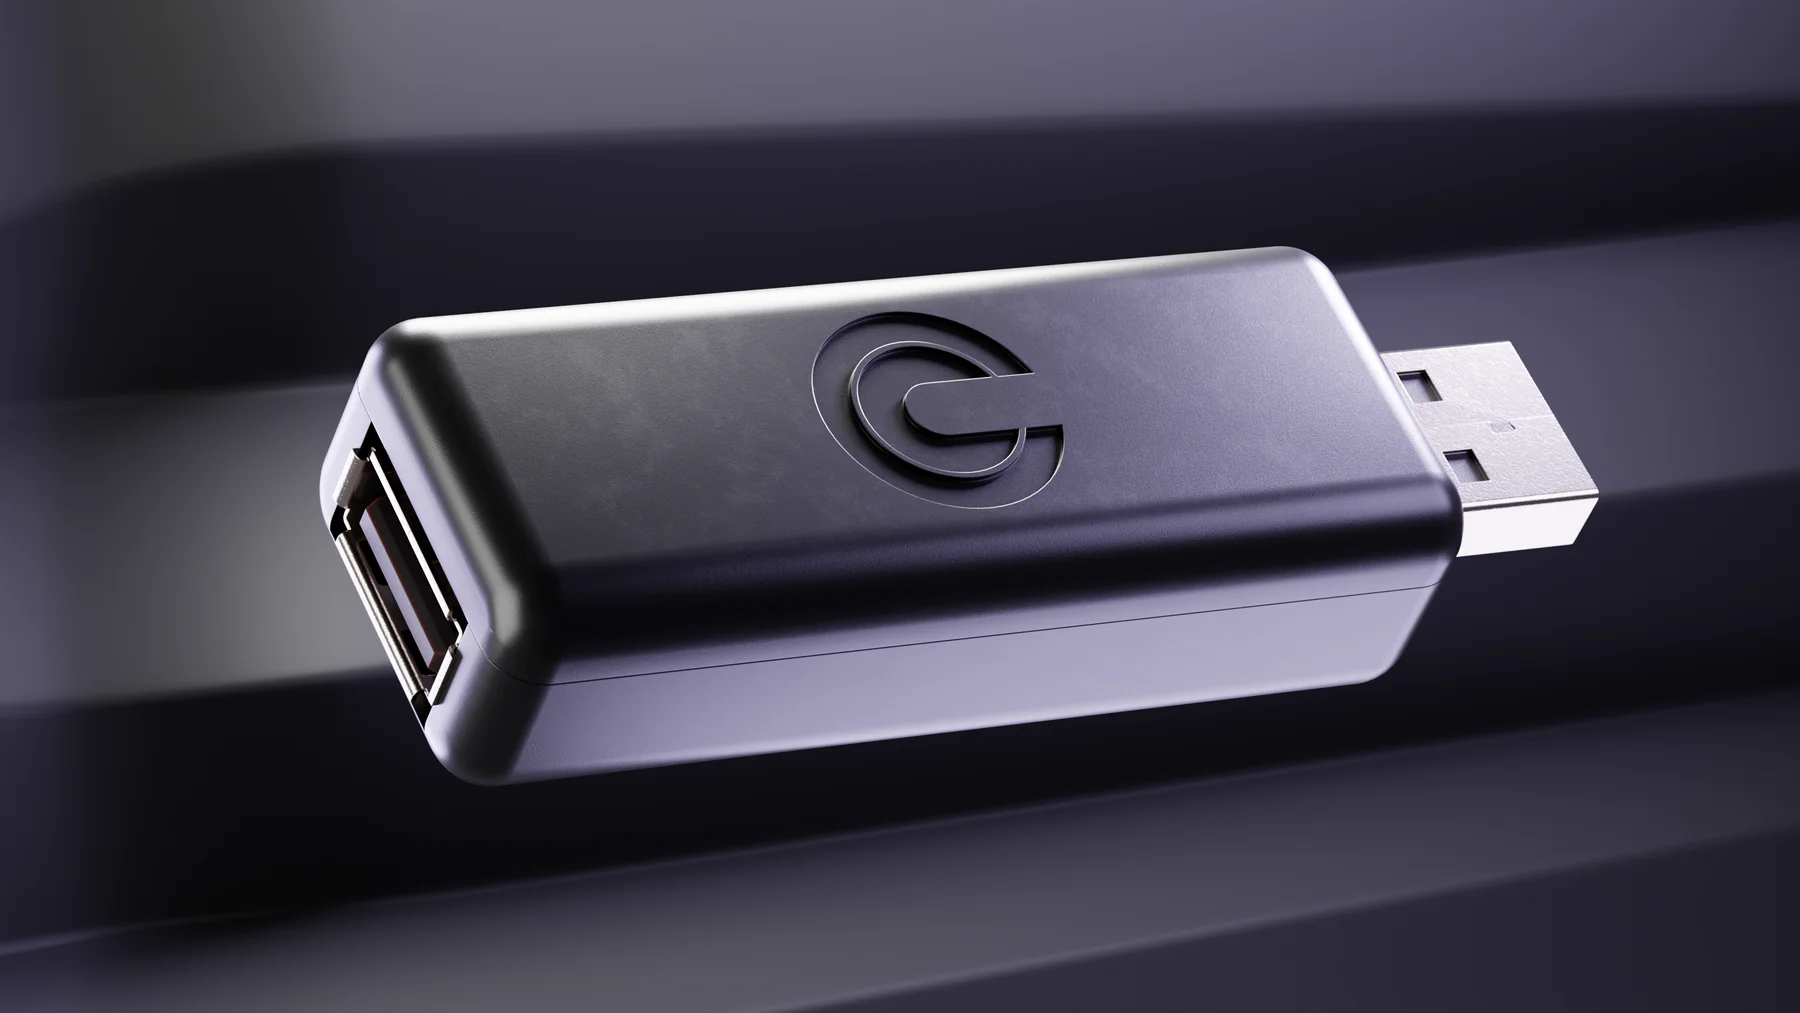
The Body
The CharaChorder X is a single piece comprised of a circuit board which is enclosed in an injection molded plastic shell. It has a single female USB-A port, and a single male USB-A connector. You can find the dimensions of the CharaChorder X in the table below.
Length |
Width |
Height |
|
|---|---|---|---|
Shell |
59 mm (5/16 in) |
23.25 mm (15/16 in) |
16.15 mm (5/8 in) |
Shell + Connector |
71.5 mm (2 7/8 in) |
23.25 mm (15/16 in) |
16.15 mm (5/8 in) |
Connections
Your new CharaChorder X comes with two connections: a female USB-A port, and a male USB-A connector. The CharaChorder X draws power from your computer via the USB-A male connector and passes on power as well as communicates with your keyboard through the female USB-A port.
Plugging In
The CharaChorder X is plug-and-play, so it doesn’t require any additional software to work.
Warning
IMPORTANT: During your first time plugging your CharaChorder in, and every time thereafter when you have realtime feedback enabled, it’s recommended that you have your cursor in a blank typing space. The CharaChorder has a welcome message that can send instructions to your computer that are not intended by the user. This feature can be disabled in the GTM.
Take the male USB-A connector from your keyboard and plug it into the CharaChorder X’s female USB-A port. After that, take the male USB’A connector on the CharaChorder X and plug it into a female USB-A port on your computer.
Upon connecting, you may notice the following things:
If your cursor is somewhere where text can be entered: You will first see the text “Loading ### Chordmaps” highlighted, and a few moments later, “CCOS is ready.”
Regardless of whether or not your cursor is somewhere where text can be entered: You will be able to see a small, red colored light inside the shell of the CharaChorder X.
If you have realtime feedback enabled, once you can see the highlighted text that reads “CCOS is ready”, your device is ready to be used.
Note
IMPORTANT: Realtime feedback is enabled by default on new CharaChorder devices.
Getting Started
There are a few steps that you’ll likely want to take if this is your first time using your CharaChorder device. In the following section, we will update your device, explain navigation in the GTM, and demonstrate the default layout on your new device.
Updating your Device
Checking your Device’s Firmware
You can check your device’s current firmware by following the steps below:
On a chromium based browser, such as Chrome, go to the CharaChorder Device Manager (Linux users see this link for more information about configuring serial port access.)
Click “Connect” at the bottom middle of the page
When the popup box comes up that reads “charachorder.io wants to connect to a serial port”, choose your CharaChorder device, then click the “connect” button

After following the above steps, you can find your
firmware version in the bottom left of your screen. It will read
something like this: CCOS 2.0.2
Updating the Firmware
If you find that your device is not running the latest firmware version, you can follow the steps below to update your device. You can check which is the latest firmware release by visiting this site.
Warning
IMPORTANT: Before performing the below steps, please make sure that you have a backup of your layout, chord library, and settings. The update might reset those, so it’s important that you keep backup files handy. For instructions on how to restore backed up files, visit the Backups section.
On a chromium based browser, such as Chrome, go to the CharaChorder Device Manager
If not auto-connected, click “Connect”
When the popup box comes up that reads “charachorder.io wants to connect to a serial port”, choose your CharaChorder device, then click the “connect” button
Click on the CCOS version on the bottom left of the page

You will see a list of available versions along with their release date. Click on the one you want.
Click “Apply Update”
At this point, your device will automatically reboot. Congratulations! You have successfully updated your device. You can check your device’s firmware version by following the steps here.
Understanding the Settings
The CharaChorder X has settings that are user-configurable. Since the device is plug-and-play, you don’t need any software to edit the device’s settings; all you need is a place to type text. We call these settings the Generative Text Menu, or GTM for short.
You can access the GTM by chording the ESC key and the letter g (G + ESC) in any space that allows text entry such as a notepad app. For an explanation on chords and how to perform them, visit the Chords section.
Warning
A bug currently exists on Windows 11 default Notepad app where chording doesn’t load correctly. We are looking into this, but, for now, we recommend using a different app.
Once you perform the chord to call up the GTM, your CharaChorder will type out the menu and its options. It will look something like this:
CharaChorder GTM [ >K<eyboard || >M<ouse || >C<hording || >D<isplay || >R<esources ]
Navigation around this menu is based on letter-presses. In the example
above, you can select the desired submenu by pressing the letter between
the angle brackets (for example: >K<) in your target submenu on your
CharaChorder One. In the example above, you would press K for
Keyboard, M for Mouse, C for Chording, D for Display, and
R for Resources.
In some submenus, you will see numeric values. In order to increase or decrease these, you can use the up and down arrow keys on your keyboard.
CharaChorder > Chording > Press Tolerance [ Use up/down arrow keys to adjust: 25ms ]
You can read an explanation on all of the settings on your CharaChorder device here.
The Layout
The CharaChorder X uses your keyboard’s layout, so you don’t have to learn a new one. The CharaChorder X reads the keycodes that your keyboard sends and makes use of them to produce outputs on your computer. The only drawback to this is that the CharaChorder X is unable to read keypresses that do not send a code. One common key that doesn’t send a code is the Fn key. This key serves as a layer-access key, locally on your keyboard, that allows you to reach the F-keys. Although the CharaChorder X is unable to read the Fn keypress, the F-keys (F1-F24) will send out a keycode, and, thus, the CharaChorder X will send out that signal to the computer.
Additionally, the CharaChorder X enables you to make use of two extra layers as well. In order to reach those layers, you will have to remap your keyboard to include the layer access keys. Nonetheless, you can continue reading below to learn how the layers work on the CharaChorder X.
Layers
The CharaChorder X has 3 layers: the base layer called the A1 layer, the secondary layer referred to as A2, and the tertiary layer named A3. Since the CharaChorder makes use of your keyboard’s layout, the layer feature makes it so that you can potentially triple the number of keys you have access to.
A1 Layer
The A1 layer is the main layer that is active by default. You can access all of the keys on your keyboard without having to hold or press anything else. This is the main layer. Your CharaChorder-connected keyboard will always be in the A1 layer upon boot.
While the A1 layer is active on the CharaChorder X by default, you can map the A1 access key, which bears the name “Primary Keymap (Left)” or “Primary Keymap (Right)”, on the Device Manager.
A2 Layer
The A2 layer, sometimes referred to as the “number layer”, is accessible with the A2 access key. This key is NOT mapped on your CharaChorder X by default, because the CharaChorder X uses your keyboard’s layout. In the Device Manager, this key has the name “Numeric Layer (Left)” and “Numeric Layer (Right)”.
Any key that is on the A2 Layer can only be accessed by pressing and holding the A2 Layer access key along with the target key. You do not need to chord the keys together; it’s only required that the A2 Layer access key is pressed while the target key is pressed.
A3 Layer
The A3 layer, sometimes referred to as the “function layer”, is accessible with the A3 access key. This key is NOT mapped on your CharaChorder X by default, because the CharaChorder X uses your keyboard’s layout. In the Device Manager, this key has the name “Function Layer (Left)” and “Function Layer (Right)”.
Any key that is on the A3 Layer can only be accessed by pressing and holding the A3 access key, along with the target key. You do not need to chord the keys together; it’s only required that the A3 layer access key is pressed while the target key is pressed.
Shift Modifier
On top of the three aforementioned layers, the Shift key, which is a modifier, can be used to access some extra keys. The Shift keypress works just like it would on a traditional keyboard. You can capitalize letters and access symbols attached to numbers. This works with any key on any layer, just like other modifiers (such as CTRL and ALT). The Shift modifier output is currently controlled by the Operating System that your CharaChorder is plugged to, and it is not possible to customize their outputs.
In the Device Manager, this key has the name “Shift Keyboard Modifier (Left)” and “Shift Keyboard Modifier (Right)”, one for each side of the keyboard.
The Shift is accessible by pressing the key labeled “Shift” on your keyboard. Any key that requires the Shift Modifier can only be accessed by pressing and holding the Shift key along with the target key. You do not need to chord the keys together; it’s only required that the Shift key is pressed while the target key is pressed.
Configurability
You can change the layout of your keyboard while it’s connected to the CharaChorder X, which means that you can remap almost all keys. Some users may choose to remap their device’s layout to accommodate missing keys, such as the DUP key. For a thorough explanation on how remapping works and how to remap your device, visit the remapping section
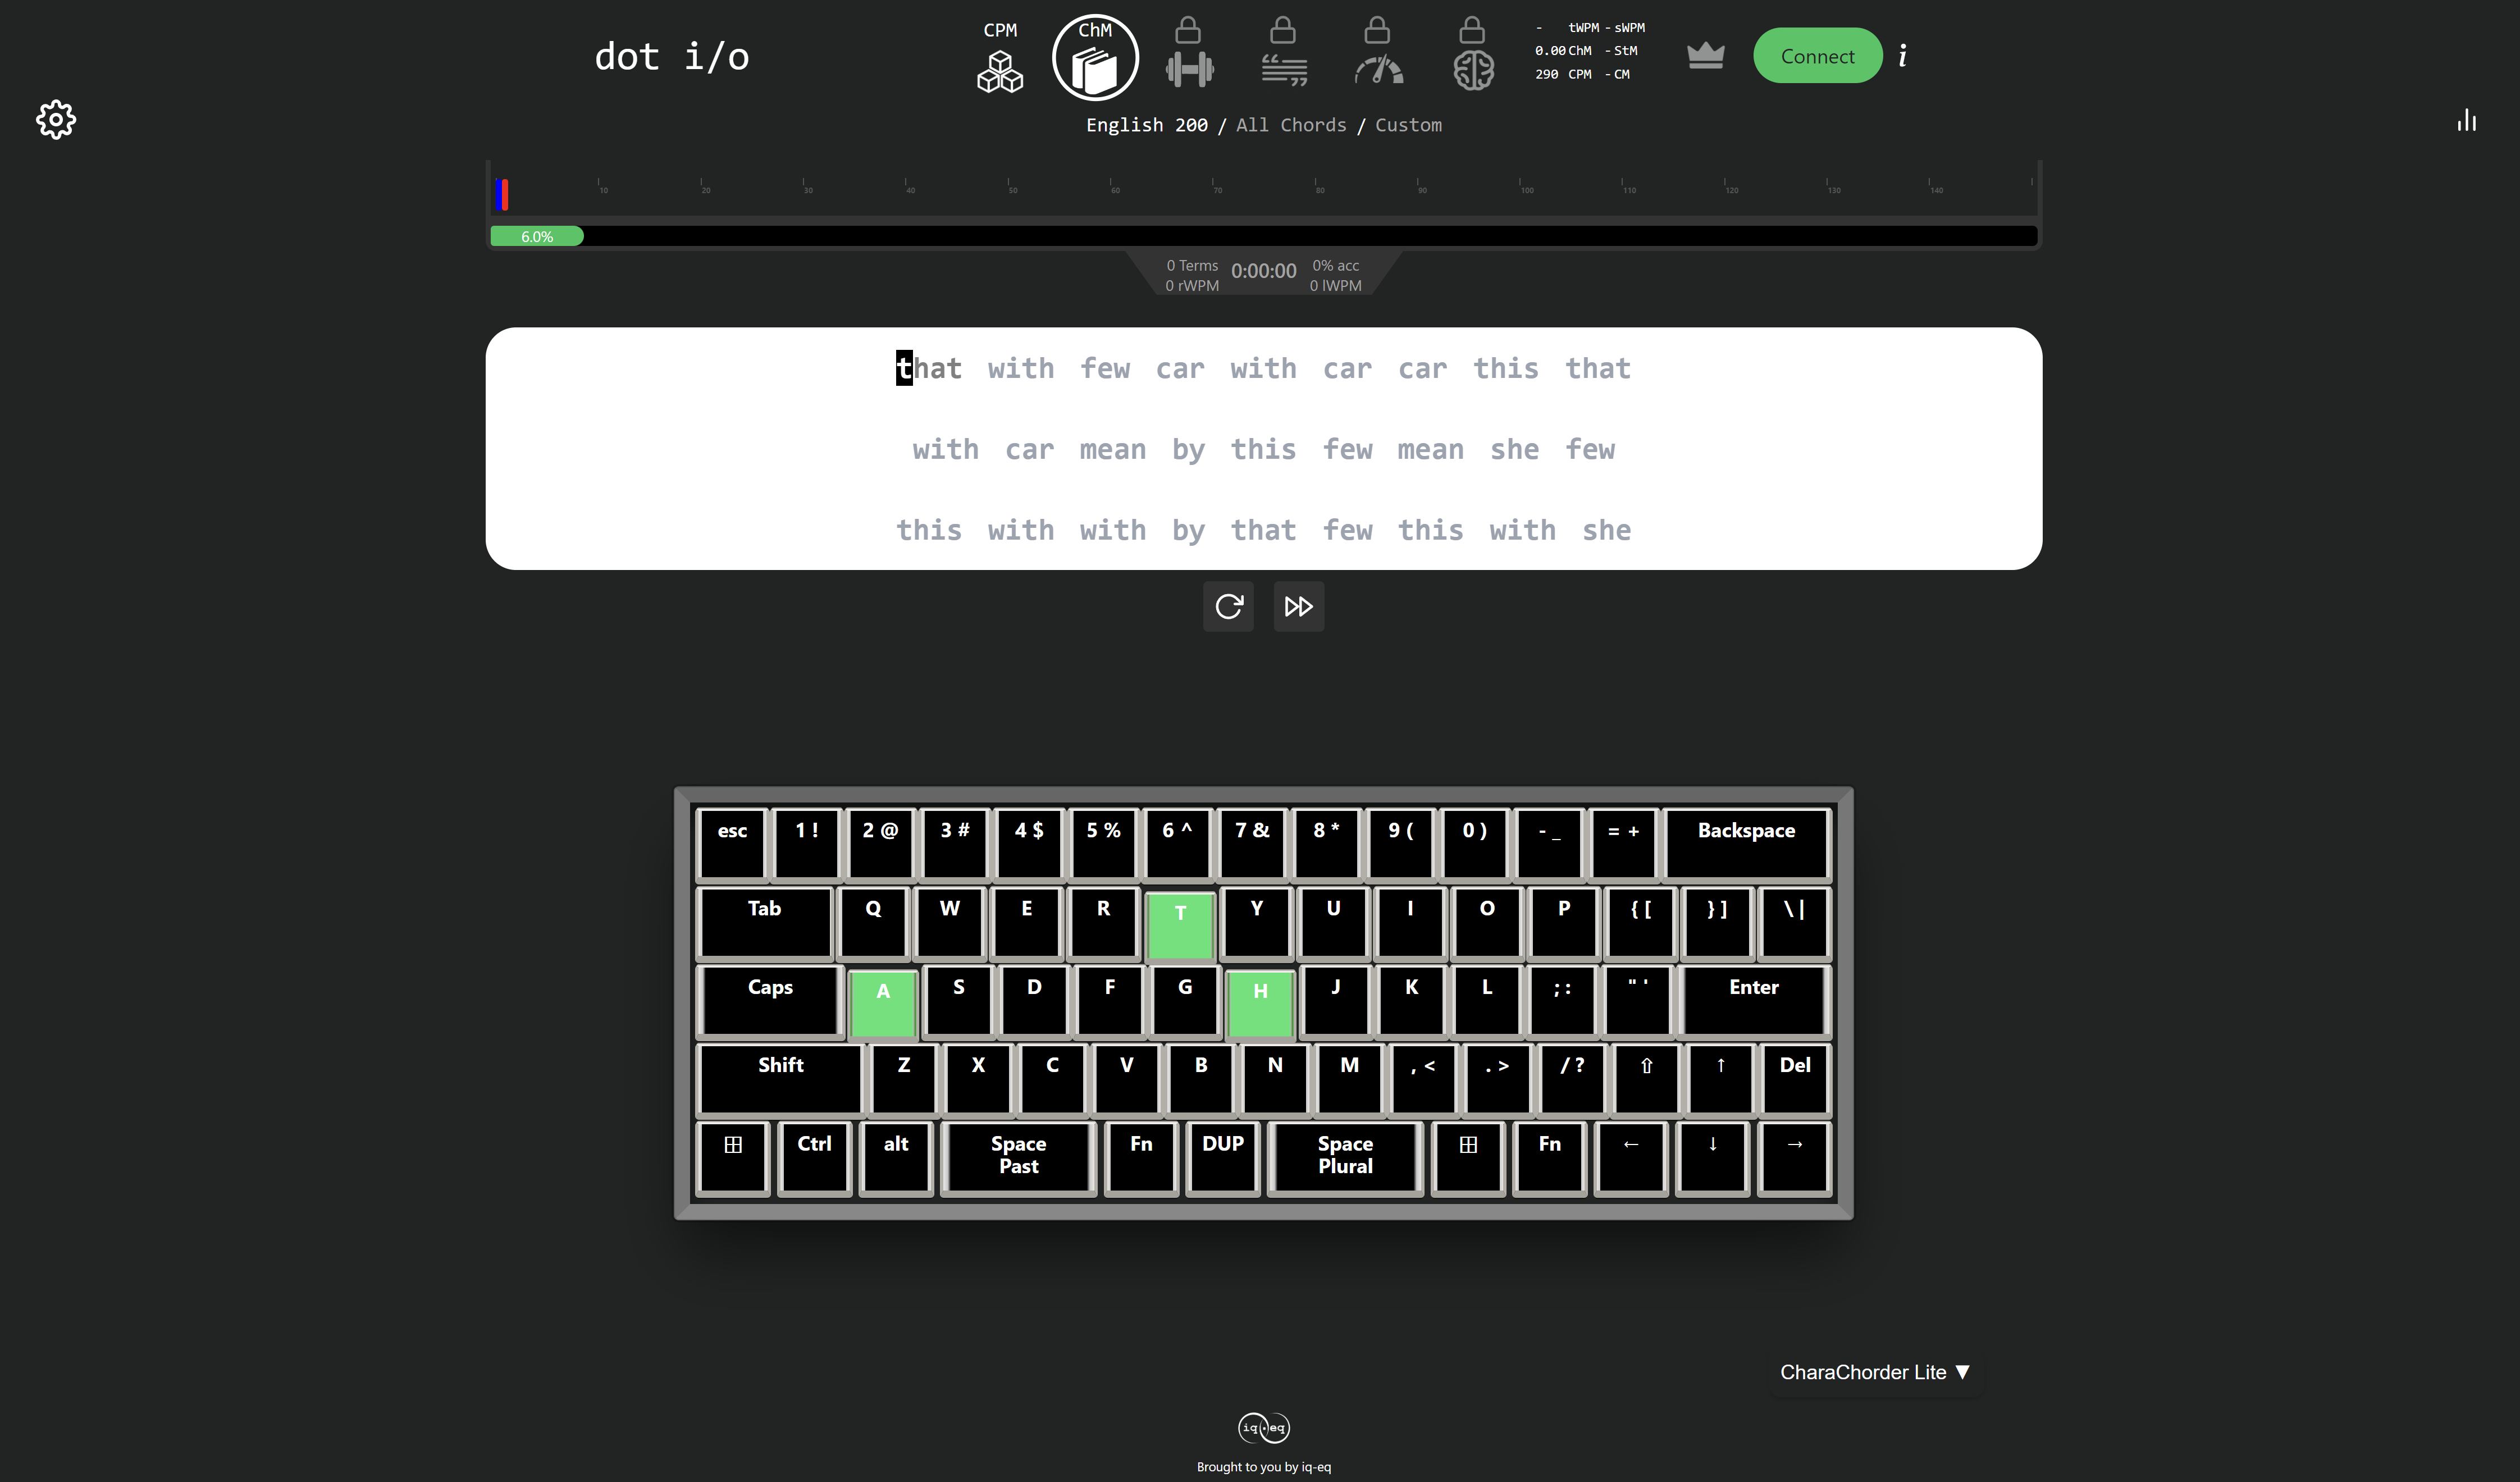
Practice
Now that you’re familiar with your new CharaChorder device, it’s time to use it! Head over the the training section for instructions on how to get started with learning your device. If you want to just jump in without having to read a minute longer, head on over to our training website; https://www.iq-eq.io/#/